Exploring Shaders in Flutter: My Journey from Knowing to Implementing 🎨
I recently discovered what shaders are and the impact they have on the visual industry. What really surprised me was realizing how easy it is to use them in Flutter, which opens up a world of possibilities for developers.
That's why I decided to write about shaders, explain how to implement them, and share some of the tools I used. These tools made the development process much easier and, honestly, a lot more exciting.
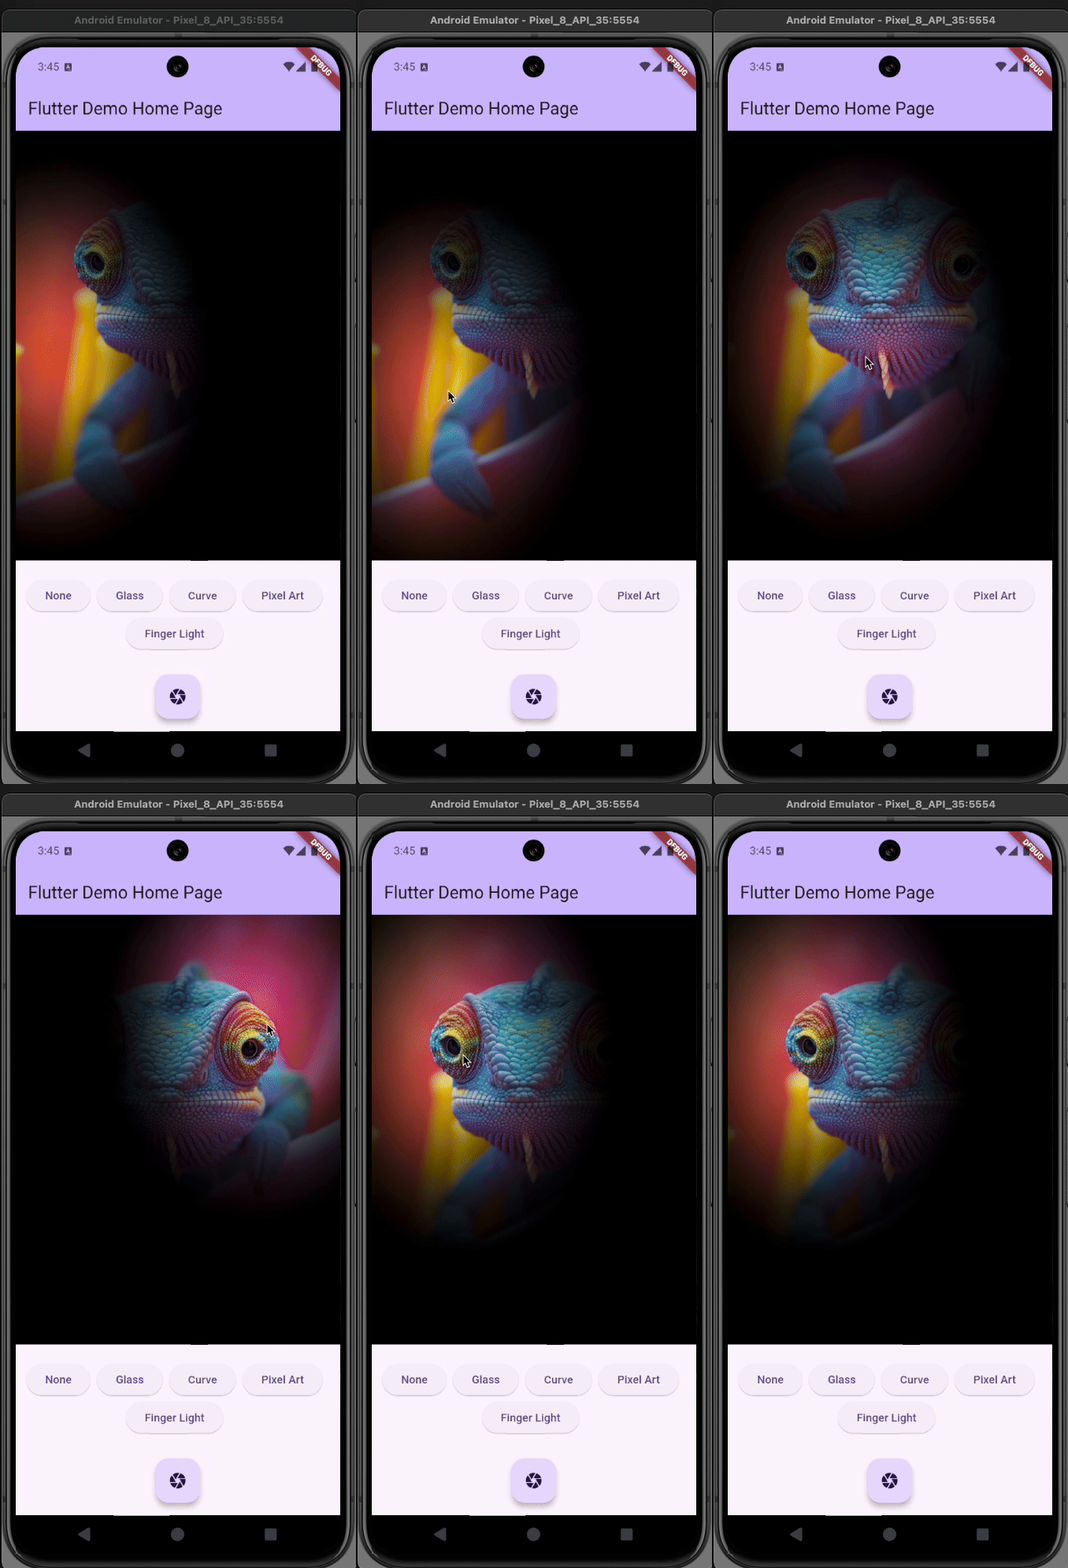
👾 What is a shader?
A shader is a small program that runs on the graphics card (GPU) to process images, apply visual effects, and improve graphical performance. Its main function is to calculate how the pixels of an image should be drawn, allowing for effects such as shadows, lighting, textures, and colors.
Although shaders are often associated with 3D graphics, they also have applications in 2D. In the case of Flutter, they can be used to create custom and dynamic visual effects in the user interface, significantly expanding developers' creative capabilities.
If you're interested in diving deeper into this topic, The Book of Shaders is an excellent reference. This book covers everything from basic concepts to advanced ideas.
In Flutter, shaders are programs written in GLSL (OpenGL Shading Language). As mentioned earlier, they run directly on the GPU, which allows for efficient and fast graphical processing. Their basic structure includes essential elements that define how pixels are processed and how visual effects are applied to images.
Versioning and Precision:
At the beginning of the shader code, the shader version is typically defined, for example:

This indicates that we are using GLSL version 4.60, which is common for modern shaders. Additionally, the precision of the operations is set:

This ensures that floating-point calculations are performed with medium precision.
mediump means intermediate precision, sufficient for most graphical calculations without a significant impact on performance. This is especially useful for mobile devices or platforms where performance is a concern, as keeping precision at the necessary minimum can help optimize performance.
Including Files and Defining Uniforms:
Flutter provides an effect file (runtime_effect.glsl) that can be included to gain additional functions, and variables are defined to be used throughout the shader:

In this case, I decided to include the following variables:
- screenSize is a variable that defines the size of the screen or canvas where the image is being rendered.
- inputImageTexture is a texture used as input for the shader, usually the image to which the effect will be applied.
Fragment Coordinate Calculation:
In the body of the shader, the main function (main()) is usually defined, which calculates the final color of each pixel or fragment:
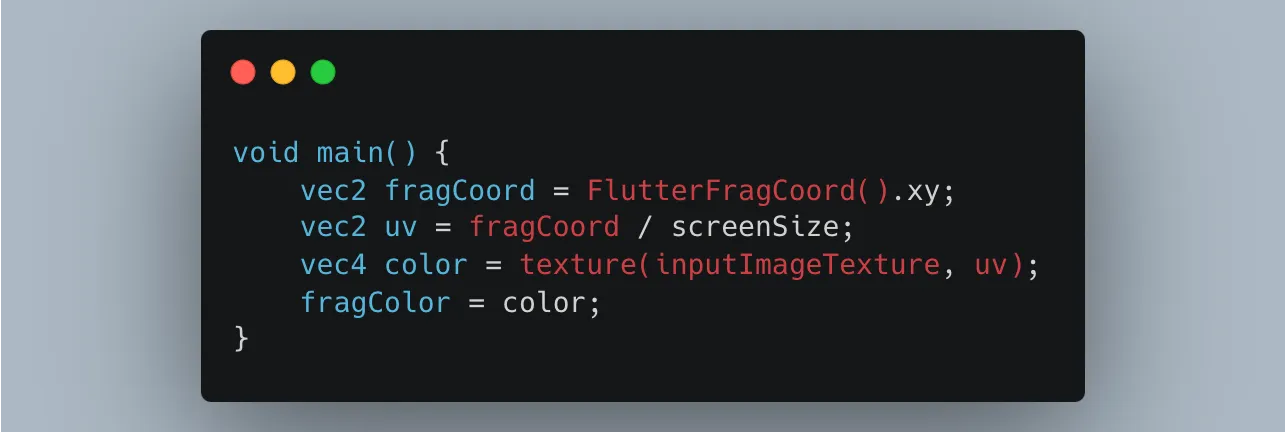
**FlutterFragCoord() **obtains the coordinates of the current fragment, allowing us to know the position of each pixel on the screen. uv is the normalized texture coordinate, which is used to access the texture (inputImageTexture) and retrieve the color of the corresponding pixel. Finally, the calculated color is assigned to fragColor, which is the color that will be displayed for that pixel.
It's important to understand that shaders work individually on each pixel or “fragment” of an image. This means that when a shader runs, it doesn't process the entire image at once; instead, it calculates how each pixel should look based on the given instructions. Each pixel is processed independently.
🧑💻 Implementing Shaders in Flutter
Now that we understand a bit more about what shaders are and how they work, let’s move on to the implementation!
In Flutter, we can use the flutter_shaders library to easily and efficiently integrate shaders into our projects. Shader files are typically placed at the same level as the lib, organized as follows:
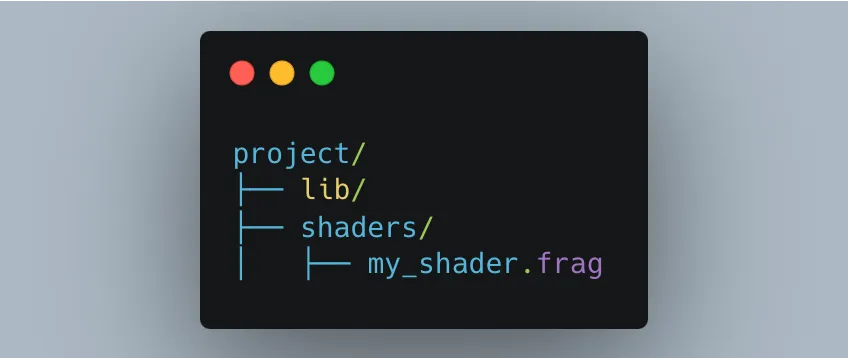
This structure helps keep the code well organized by separating the shaders from the rest of the project logic.
To make the shaders visible to the rest of the project, you need to declare them in the pubspec.yaml file. This is done right below the uses-material-design section, as follows:
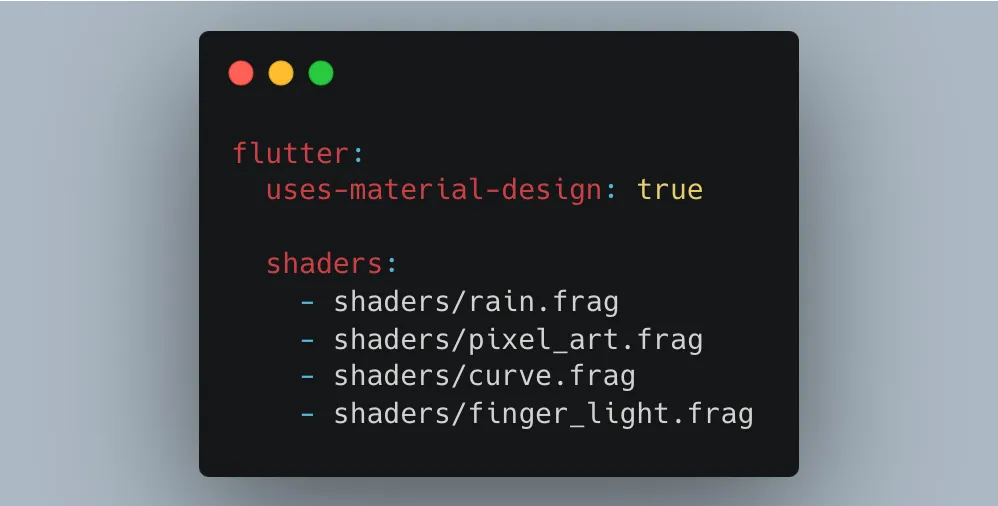
Next, we define a widget that will act as an encapsulator for the elements to which we want to apply shader effects.
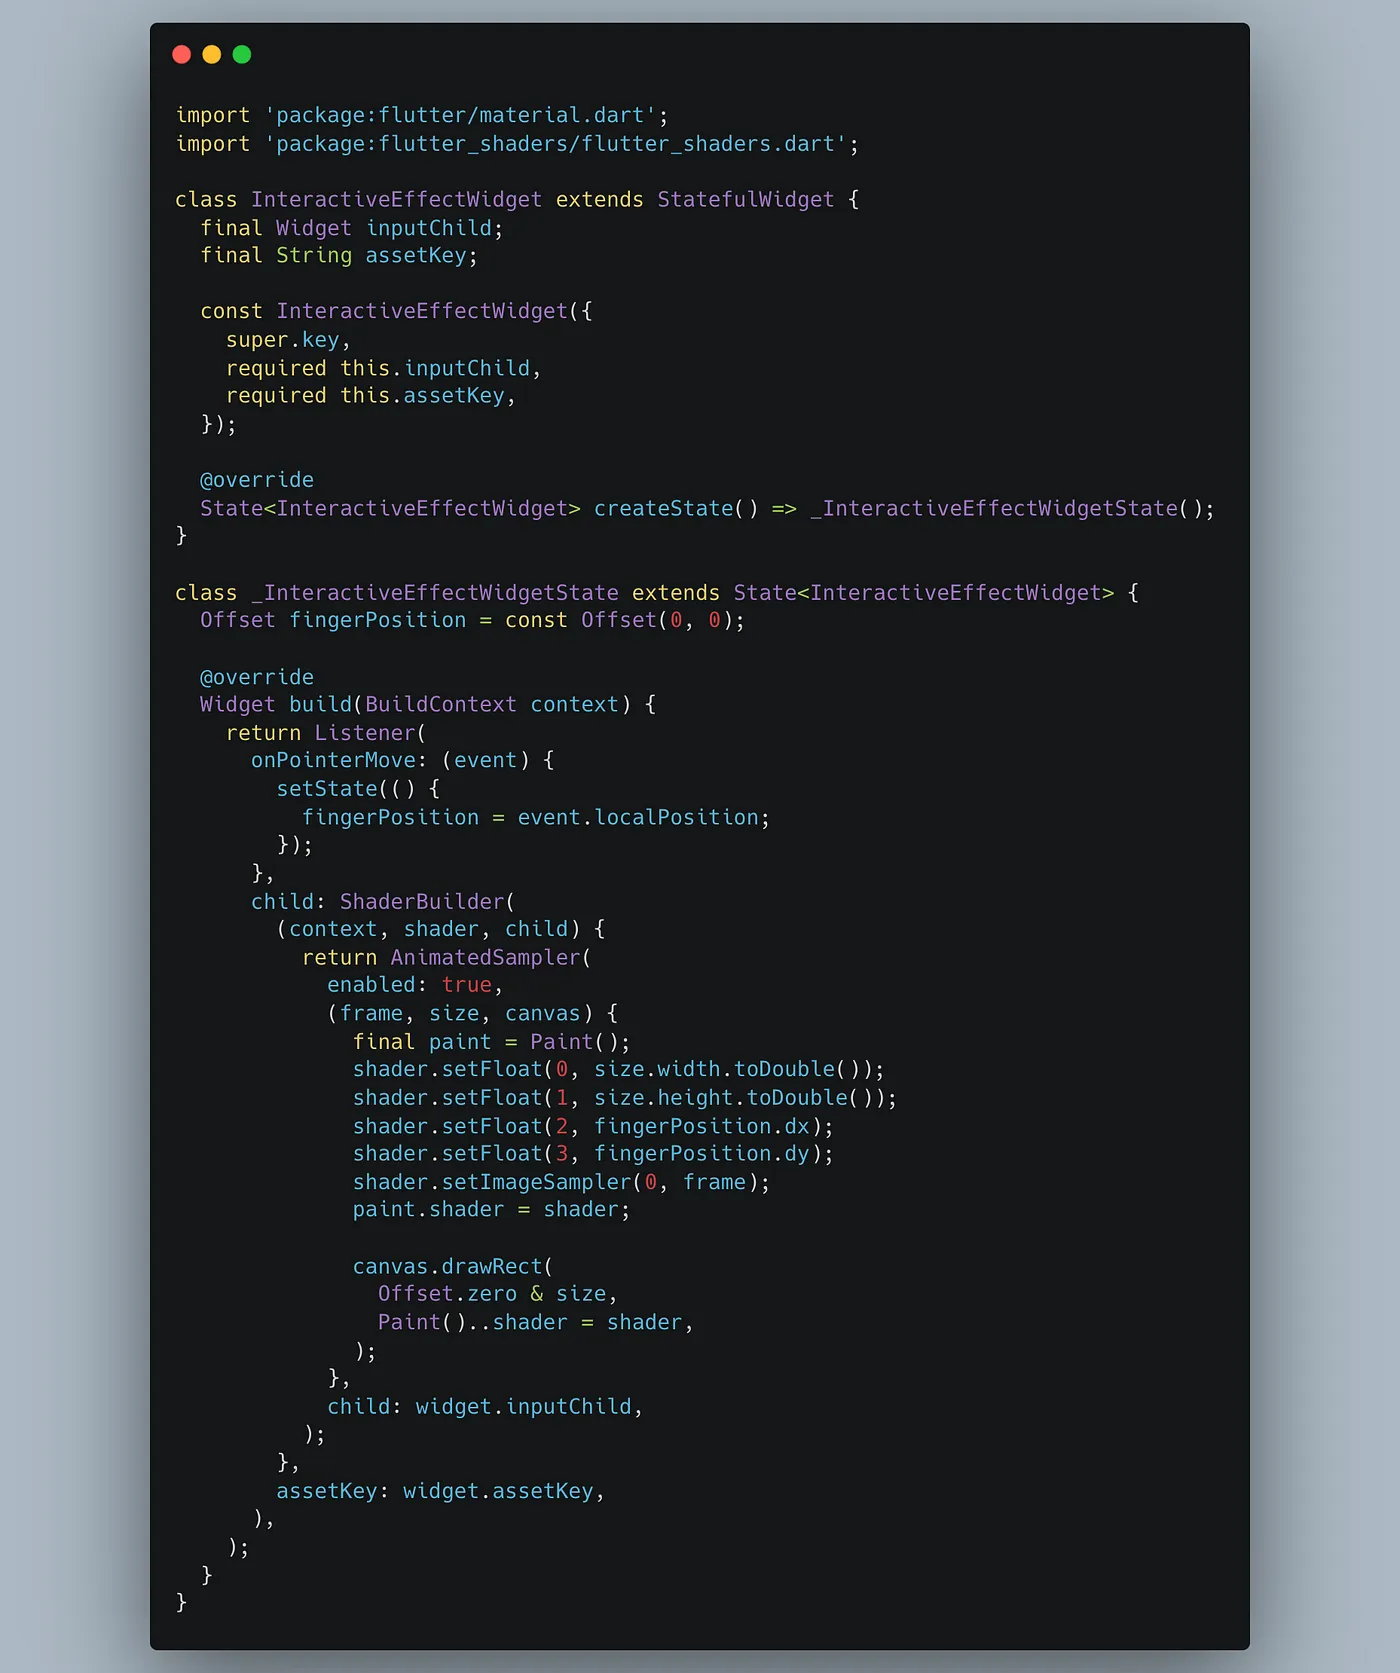
Code Description
This widget, called InteractiveEffectWidget, detects the user's finger movements and updates a shader in real-time to reflect those changes.
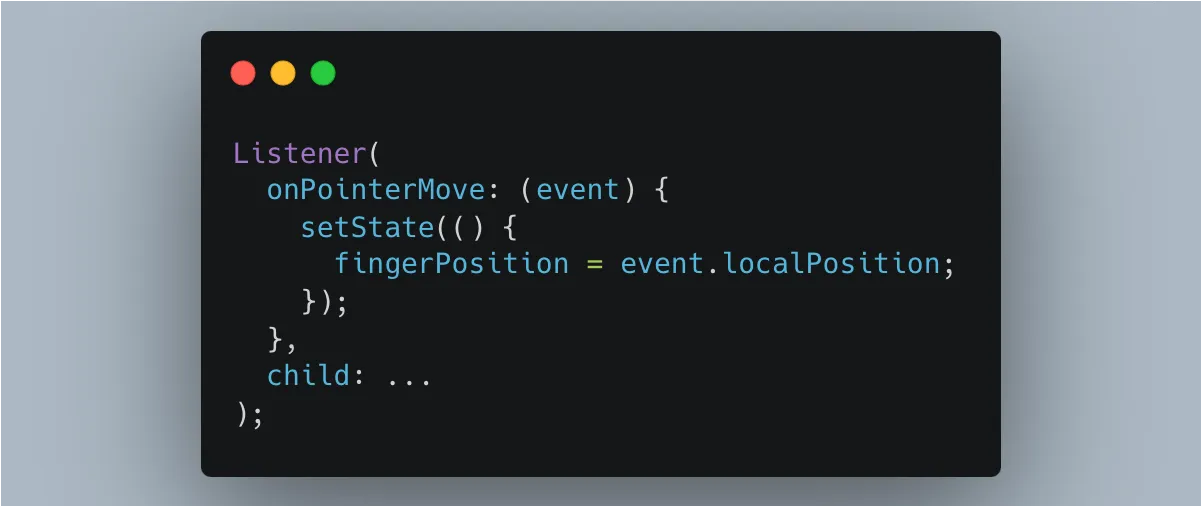
1. Capturing Position with Listener
The widget uses a Listener to capture the user's movements on the screen. Each time the user moves their finger, the local position is updated in the fingerPosition variable:
2. Using the Shader
Inside ShaderBuilder, we use AnimatedSampler to apply the shader in an animated way. The code performs the following on each frame:
- The image dimensions (width and height) are set using
shader.setFloat. - The finger position in x and y is provided.
- The image (frame) is passed to the shader with
shader.setImageSampler. - The shader is drawn over a rectangle that covers the entire screen, continuously applying the visual effect.
Shader Part: Code Analysis
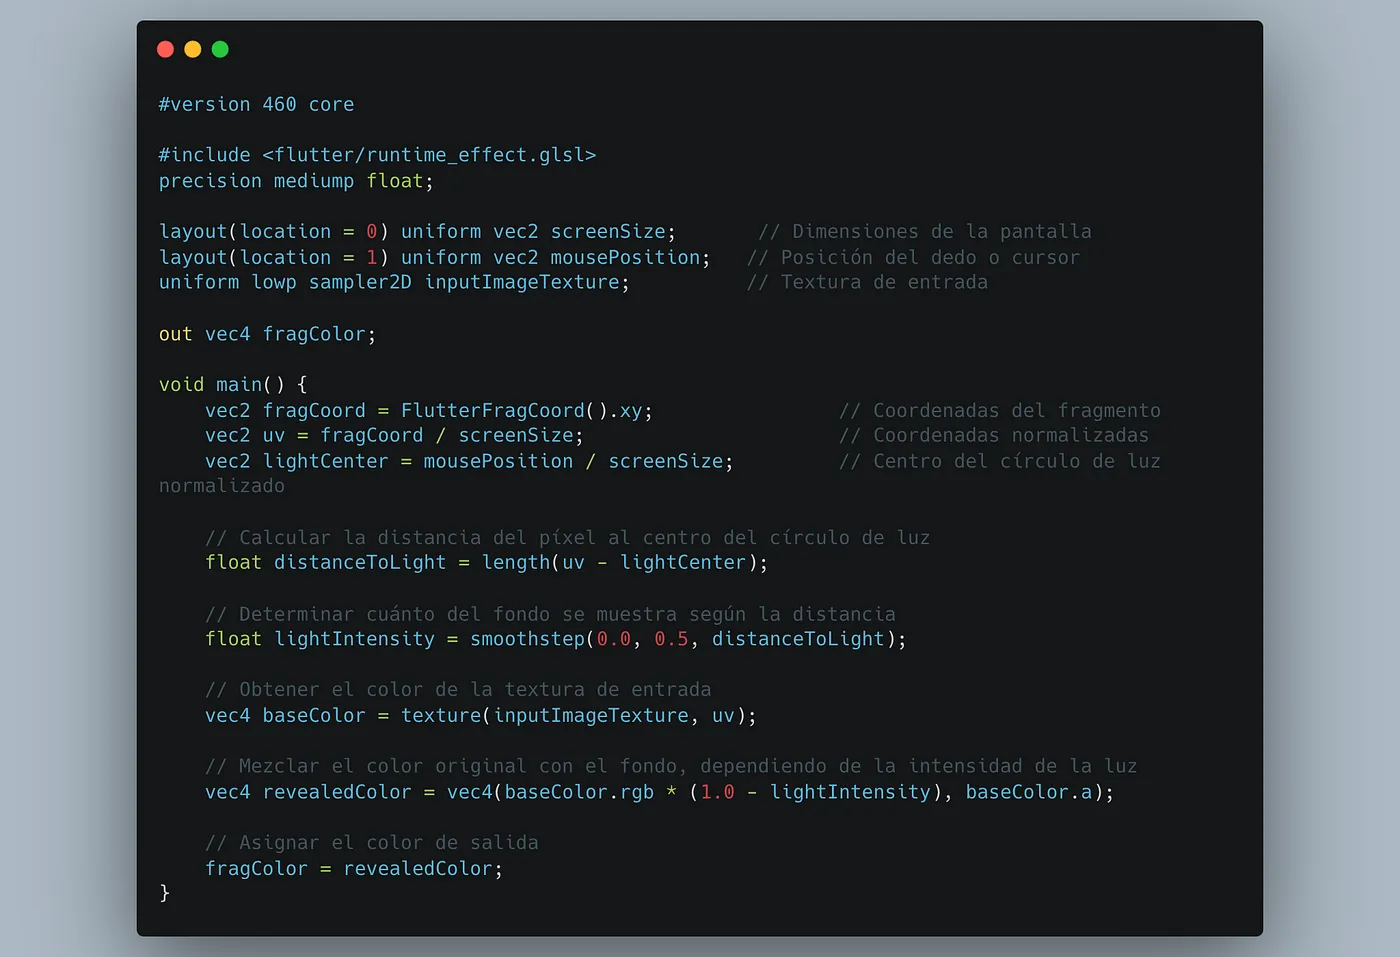
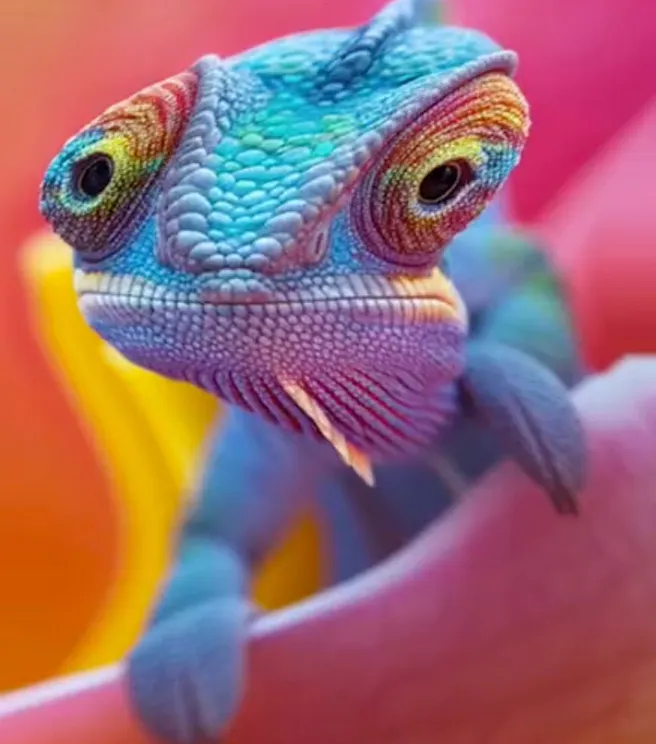
With this shader, we achieve a visual effect similar to the one shown at the beginning of the post: by moving the finger across the screen, we can modify the position of a vignette or mask that reveals specific parts of the background image.
So, how does this work? 🫤
The trick lies in how shaders process pixels. In this case, the shader takes the touch coordinates (finger position on the screen) and uses them to determine which parts of the image to display and which to darken. This dynamic effect is achieved by combining coordinate mathematics with the shader’s visual properties.
1. Uniforms and Variables
As we saw earlier, the shader receives information from Flutter via uniforms, which are global variables that remain constant during the drawing process:
screenSize: The dimensions of the drawing area in Flutter.mousePosition: The position of the finger or cursor, updated dynamically.inputImageTexture: The image or texture that will be processed.

2. Coordinates and Normalization
In the shader:
- The fragment coordinates (
fragCoord) are calculated using theFlutterFragCoord().xyfunction. - These coordinates are normalized by dividing them by
screenSize, resulting in values between 0.0 and 1.0 (uv), which makes it easier to perform proportional calculations for any screen resolution.

3. Calculating the Distance to the Light Center
The finger position, provided by Flutter, is also normalized (lightCenter). Then, the distance between each pixel and the light center is calculated:

4. Light Intensity
smoothstep is used to smooth the transition between lit and dark areas, based on the distance to the light center:

5. Color Blending
The color of each pixel of the texture is modulated according to the light intensity. As the distance increases, the color fades to create a light effect that “reveals” parts of the image:

6. Final Result
The processed color is assigned to fragColor, which is the visual output of the shader.
And that's it!! This approach allows for applying complex visual effects to any widget within Flutter in a simple and animated way.
Feel free to check out the full code, along with some other examples 😃.
https://github.com/Mauro124/flutter_shaders
See you in the next post! 👋🖖
References
If you're not familiar with the difference in processing between CPU and GPU, here's a Mythbusters video that makes it crystal clear 😉
Video - Mythbusters Demo GPU versus CPU
Do you want to develop an app in Flutter?
Learn more about us at https://mtc-flutter.com/
Follow us on Instagram @mtc.morethancode